Thursday, December 14, 2017

A Quick Review of Glaco Glass Refresh and Glaco Roll-on Coating

I have been wanting to do this write up for a very long time but things would not always go as planned. So this is my quick review and opinion on Glaco Glass Refresh and Glaco Roll-on Coating.


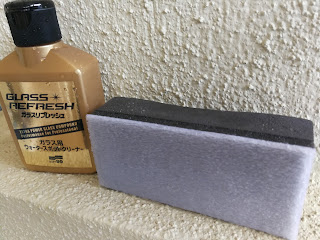
Glass Refresh is a glass polish that is claimed to be able to remove not only dirt but watermarks. It came packaged with an applicator. The content inside the bottle is a white milky liquid.

So after giving the car a wash, I did snapped some before pictures of the windscreen.


As can be seen, there are some heavy watermarks.

I used to applicator to apply the milky liquid evenly with some force. I did left to right then top to bottom to make sure I covered the windshield evenly.


After a while, the liquid dried up to a powdery like form. Once fully done, I rinsed off the whitish stuff and immediately I noticed a difference in the water behaviour. The way the water flows off the windshield showed that there is totally nothing on the glass - no hydrophobic effect at all. The water just fully "wetted" the windshield.


Now this is a very clean glass. But this will not be ideal for driving. Visibility will be poor when raining.

This is where the coating comes in. After drying the windshield, I forgot to do the most important step - to take an after picture! Yes, sorry folks, there is no after picture. But trust me, most of the heavy watermarks are removed. I believe applying a second round would remove those stubborn ones.

So, after drying, I applied the roll-on coating. It is stated that the surface has to be very dry when applying. After applying, I let it fully cure (dry). It became hazy when dried up. Then, I buffed off with a dry microfiber towel. As per instruction in their website, I let it cure for more than 12 hours. So no more after behavior picture too :(.

After drying, I did not forcefully test it with water but when it rains, the water for forms droplets like any treated glass. Much like RainX. However, the coating will cause the wipers to be a little juddery but not like disco style. Still barely acceptable.

So there you have it guys. A short review.
Thanks for ready and happy detailing.


Monday, August 28, 2017

Detailing the Details

Details like emblems, logos, model numbers, key holes are hard to care for. Those areas tend to be neglected when washing. They become a pain in the b*tt when polishing and waxing as the polish or wax would get "trapped" in between them. After prolong time, they become caked up with polish and wax residues combined with all the road grime and dirt. Soon they would become an eye sore on your nicely detailed shinny ride.

In this post, I would share how I normally detail those details. As always, the following methods are what I normally practice. They are just my personal preference. The methods would depends on the level of dirtiness as well as the condition of your ride. I hope this would serve as a reference. Know your ride and find out what is the best method that suits you and your ride.

The general idea is to detail these areas while washing the car. Take advantage of the suds generated in your car wash bucket. The tool to use would be a soft bristle brush. It could be anything from a detailing brush to a paint brush or a dusting brush. If you feel that the paint on your ride is hard enough a soft bristle toothbrush might even work. Just test on a small area to make sure that it would not mar the paint. Just don't use toothpaste! They are meant for your teeth and not your car. The abrasives in toothpaste might mar and ruin your ride's paint.

Here I would normally use a detailing brush. This particular one is from Autoglym but any soft detailing brush would work fine. This brush came together with Autoglym wheel cleaner set and it is meant for alloy and painted wheels. I tested on my ride's paint and it seems gentle enough.

autoglym detailing brush
Autoglym Detailing Brush

Get a generous amount of car wash on those area. Dip the brush into the wash and then gently brush the area. Brush and agitate gently. Let all the suds lift up the dirt as you are brushing.


The idea is to use the brush to get into every nook and crevice to brush up all the dirt. The suds from the car wash would help lift them up.

The same thing could be done on the door handles too especially on the under side.


Besides using normal cash wash shampoos, no-rinse and  waterless wash could be used too. The lack of suds on waterless wash is compensated by the increased lubricity and dirt encapsulation capabilities. Similar to using normal cash wash, soak the area with plenty of waterless wash and gently clean with a brush.

Rinseless and Waterless Wash
No-Rinse and Waterless Wash


If the dirt proves to be too tough to remove, a stronger solution could be used. They could range from a pH neutral wheel cleaner like Chemical Guys Diablo or diluted all-purpose-cleaner like Optimum Power Clean (aka Alien Clean).


chemical guys diablo gel wheel cleaner

Optimum Power Clean


Do make sure to wax back those areas after cleaning as they might strip away existing protection.

There you have it. A quick and effortless method to detail the details.
Happy detailing.

Saturday, July 29, 2017

Synthetic Waxes Durability Test Update: Month 3 (end)

It has been slightly more than 3 months and the results are as follows.
Please see here for the initial post.


This was taken on July 29th 2017.

The below picture shows what were applied.


SealantsWater BeadingWater Sheeting
Autoglym Extra Gloss Protection11
Finish Kare Hi-Temp Paste Wax11
Fusso 12 Months Wax22
Meguiar's Ultimate Paste Wax11

It seems that the effects of most of the sealants are starting to diminish. However Fusso seems to be still working but I am not impressed.

True to most of our understanding and suspicion, there are "severe" water marks on the Fusso section.


As discussed in earlier post:
"The general idea of a hydrophobic surface is that dirty liquid will not "wet" and smear all over the surface. But if those water droplets are left to stay till dry (hard water and/or with some dirt encapsulated in them), there could potentially be water mark".

My wife drives to work every weekday and the car is park under the sky at her workplace. If it rains, the rain water plus surface dirt will bead up on the Fusso section. When the rain stops with the sun coming out, the water bead will dry up and whatever that is inside the droplet would be etched onto the car surface.

So far, I did not see any water mark on other sections. That is why I used the word "severe" earlier. As such, I do not intend to continue this evaluation. As mentioned in the initial post, to have a fair evaluation I skipped using spray wax on this particular test surface. Being a spray wax lover, I believe using spray wax would have minimized the water marks.

As a general conclusion (based on my personal observations and opinion), most sealants tends to last about 3 months in our Malaysian climate. Fusso might seem to be the strongest contender but the high water beading is also its biggest downfall. It does give the "wow" effect but in terms of protection, other sealants might be doing a better job. I think it is quite conclusive that high water beading might not be a quality one should look for in terms of protection in a tropical climate.

I strongly believe that using spray wax after every wash would not only prolong the longevity of the sealants but add to another layer of slickness and protection. So get yourself a spray wax and start spraying! Read about spray waxes here.

That's it for this comparison.
I would like to thank those who followed this comparison and provided constructive comments.
Stay tuned for more new posts.
Happy detailing.

Friday, June 30, 2017

Synthetic Waxes Durability Test Update: Month 2

It has been 2 months and the results are as follows.
Please see here for the initial post.


This was taken on June 24th 2017. The Fusso is still holding pretty strong. The difference compared to others is very obvious.

The below picture shows what were applied.


SealantsWater BeadingWater Sheeting
Autoglym Extra Gloss Protection12
Finish Kare Hi-Temp Paste Wax13
Fusso 12 Months Wax35
Meguiar's Ultimate Paste Wax12


That's it for this month. Let's hope the sealants can last another month.

Saturday, June 3, 2017

Quick Review: Meguiar's Headlight Protectant

I got this protectant quite a while ago. It was on sale and my itchy hand "clicked" it. It was in a sealed condition on my shelf for a very long time until I decided to try it after polishing my wife's daily drive recently.


To keep things short, I was not impressed.

First off, when I open the bottle I was greeted by a familiar scent, then a familiar look, then a familiar feel. This things smells, looks, and feels like another product from Meguiar's - Ultimate Protectant.


From my experience, everything feels exactly the same. Ultimate Protectant is marketed as a product for both interior and exterior. Both of them have UV blockers.


Ingredients


To satisfy my curiosity, I searched for Safety Data Sheets (SDS) of these 2 products to compare the key ingredients. They can be found here:

Headlight Protectant
Ultimate Protectant

The key ingredients for Headlight Protectant are as follow (% by weight):
NON-HAZARDOUS INGREDIENTS: 60 - 80
POLY(DIMETHYLSILOXANE): 10 - 30
PETROLEUM DISTILLATES: 5 - 10
ACRYLIC POLYMER: 1 - 5
PROCESSED CASTOR OIL: 1 - 5
BIS(1,2,2,6,6-PENTAMETHYL-4-PIPERIDINYL) SEBACATE: 0.1 - 1.0
POLYMERIC BENZOTRIAZOLE DERIVATIVE: 0.1 - 1.0
POLYMERIC BENZOTRIAZOLE: 0.1 - 1.0

The key ingredients for Ultimate Protectant are as follow (% by weight)
NON-HAZARDOUS INGREDIENTS: 60 - 80
POLY(DIMETHYLSILOXANE): 10 - 30
PETROLEUM DISTILLATE: 5 - 10
ACRYLIC POLYMER: 1 - 5
PROCESSED CASTOR OIL: 1 - 5
CONDITIONERS: <5

Although they are not exactly the same, they are very similar. Well, it is not compulsory to declare non-hazardous ingredients in SDS. I could not find out what they are as they are trade secret (in whisper). I have a strong feeling that the non-hazardous ingredients are very similar in both products.

I am not saying if this is right or wrong. I am saying that this is how marketing works!


Performance


Well since there is no yellowing in my wife's daily drive headlight, this would be more of a protection and prevention.

I followed the instructions and applied. I used a typical yellow round applicator pad.


It goes on oily. Then I wiped off with a towel as per instructed. After that, the surface felt "dressed" and oily.

And the best (worst) thing is that it washed off after a single wash.


Conclusion


If you just polished your yellowed headlight and looking for something to protect it, go for a proper clear coat instead of this. This is a short term solution and you might have to reapply it after every single wash or worse still after raining.

If you are looking for something to prevent your headlight from yellowing, skip it too. A proper sealant would do a better job. If you are a fan of spray wax (like me), who use spray wax after every wash, spray wax would be much better than this headlight protectant. It is more convenient too. Spray waxing the whole car is fun :p.

Happy detailing.
Disclaimer: 
Headlight Protectant does not add more shine to your headlight.
All the above are just my personal opinion.

Thursday, May 25, 2017

Synthetic Waxes Durability Test Update: Week 5

Please see here for the initial post.

This was the behavior of the sealants last weekend (May 20th).


The below picture shows what were applied.


SealantsWater BeadingWater Sheeting
Autoglym Extra Gloss Protection12
Finish Kare Hi-Temp Paste Wax14
Fusso 12 Months Wax55
Meguiar's Ultimate Paste Wax13


As can be seen, Fusso 12 Months Wax is still beading water very well after 5 weeks of application with several washes in between using Meguiar's Ultimate Wash & Wax and Gold Class. As for the others, although they are not beading water, they are still sheeting water quite well. Kudos to all manufacturers.

Again, I want to stress that the above rating is very subjective and not absolute.

I received some questions about water beading and water sheeting - which is better?
Not a straight forward answer but here is my take on it.

If water beads up it shows that the surface is hydrophobic (hydro for water and phobia for scared/ disliked) and because of the own surface tension of water, it will not "wet" the surface and beads up. The general idea of a hydrophobic surface is that dirty liquid will not "wet" and smear all over the surface. But if those water droplets are left to stay till dry (hard water and/or with some dirt encapsulated in them), there could potentially be water mark. If the car is moved before the water droplets dry off, then it should be good.

In my opinion sealants protects the paint by being a sacrificial barrier. They prevent dirt from sticking directly onto the paint. Be it hydrophobic or slick. A slick surface that sheets away water and dirt is as good as a surface that beads water. It is just that a surface that beads water gives a Wow effect. And this is where the marketing gimmick works :)

I am more into durability than gloss and deep shine. That is why I only have synthetic waxes or sealants but the wowing effect is irresistible. Having my car parked directly under the sky in my office every weekday, maybe it is not such a good idea.

Opinions? Please share them :)

That's all for this post. Next post will be on the next month on this durability series.
Happy detailing.

Sunday, April 30, 2017

Synthetic Waxes Durability Test Update: Week 2

Please see here for the initial post.

I did not intend to publish an update so soon but what I saw today struck me by surprise. This made me very eager to share the initial results.

It was just after 2 weeks since my wife's daily drive had been sealed. Today, I decided to give it a wash. There were a few days of rain and many days of sunshine in between. Since I would not be using any spray wax on the test panel, I decided to go with Meguiar's Ultimate Wash & Wax.

See My Car Wash Shampoos for more on this shampoo

So without further ado, here is a quick update.
Camera, action!
Play the video in full screen to have a better view. I recommend using YouTube to slow down the playback speed.


This is just after the car has been rinsed clean.

Just to refresh your memory, here is what were applied.


Some close up shots below.

Autoglym Extra Gloss Protection

Finish Kare Hi-Temp Paste Wax

Fusso 12 Months Wax

Meguiar's Ultimate Paste Wax

It seems that most of the sealants do not bead water very well after just 2 weeks in our hot and humid climate except for Fusso 12 Months Wax. However, most of them are sheeting water just fine. In order to help quantify the behavior, I have tabularized them with a scale from 1 to 5 with 5 being the best.


SealantsWater BeadingWater Sheeting
Autoglym Extra Gloss Protection34
Finish Kare Hi-Temp Paste Wax34
Fusso 12 Months Wax55
Meguiar's Ultimate Paste Wax13


Being a first time user of Fusso 12 Months wax, I was really surprised by its hydrophobic properties. Water just would not wet the surface and will just bead up. Looks like we are in for a wonderful ride.
I just wanted to stress that the above rating is very subjective. Again, there is no absolute right or wrong in car detailing.

So, what do you guys think?

That's all for this post. Stay tuned for more updates.
Happy detailing.

Monday, April 24, 2017

Synthetic Waxes Durability Test: Autoglym Extra Gloss Protection vs. Finish Kare Hi-Temp Paste Wax vs. Fusso 12 Months Wax vs. Meguiar's Ultimate Paste Wax

autoglym extra gloss protection, finish kare hi-temp paste wax, fusso 12 months wax, meguiar's ultimate paste wax

I have been wanting to do a formal comparison on the durability of these synthetic waxes. I had been using Autoglym Extra Gloss Protection, Finish Kare Hi-Temp Paste Wax and Meguiar's Ultimate Paste Wax for quite some time. Fusso 12 Months Wax is kind of a new addition. I bought it a few months ago but never really used it. Generally, I already have an idea on the durability of these waxes except for the one from Fusso. However; just to be fair; I decided to test all of them on a same test panel on a same car with the same orientation to get an unbiased result.


I gave my wife's daily drive a full wash, clay, compound, and polish treatment last week. The rear hood was "reserved" as a test panel. This panel was finished off with Meguiar's Ultimate Polish prior to applying the waxes. I did not use an IPA to wipe the panels as all of the waxes are oil based and there is no need for the panel to be stripped of the oils.

I did not tape up the panel as this is still my wife's daily drive and I do not want any part of the panel to go unprotected. I did not want to surprise my wife with a zebra crossing pattern! However, individual applicator pads are used for each wax. There could be some "cross contamination" so take this with a pinch of salt.

The plan is to see durability of these waxes. The car will still go through regular washes except that I would not be using any spray wax on this test panel.


There was some overlapping in the application...


Fast forward a week (today) it rained when I was about to do some inspection... Haha!


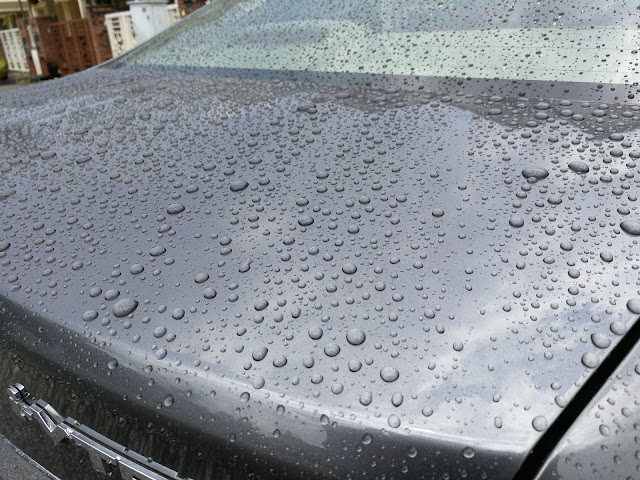
The car has yet to be washed. It seems that the entire test area is still beading water quite well.
Some closer shots below.


There entire surface is still slick to the touch. Let see how it will be in another few months time. I will be posting updates from time to time.

That's it for today.
Happy detailing.

Update:
Week 2 results
Week 5 results
Month 2 results
Month 3 results

Sunday, April 2, 2017

Glass Care

Water marks on glass could be rather annoying. Since glass is much harder than paint or clear coat on paint for that matter, removing water marks should be easier.


Good Glass Cleaner


Regular car shampoo should do a good job in cleaning all the glass in your regular wash. In fact some shampoos have some "wax" that will help windscreen repels rain droplets. However, if there is already water spots or marks on the glass, regular car shampoo might not do the trick. Then it is time to move on to more serious glass cleaners.

Get a glass cleaner that is meant for automotive. Try to avoid household glass cleaners as some of them might contain ammonia and acid that could be harmful to both your health and your car. Regular household glass gleaner with "colored" liquids could even stain your car.


What I have in my arsenal is Meguiar's Glass Cleaner and Stoner Invisible Glass. Both of these cleaners are colorless and contain no ammonia and acid. The material safety data sheets could be found here and here, These two glass cleaners contain alcohols. Alcohols are common in glass cleaners. They help in removing oil and give fast drying "evaporating" results. So a little bit if caution here. Try not to get them on your car paint as they would strip away wax and and sealant because of the alcohol content. Right, end of chemistry class. 

These two products smell the same. I could not confirm if they are the exact same product but if they are, the Stoner would be a better buy because of the lower price.

They claimed that they would not create streak marks. However, from my experience, they do streak no matter how many times I wipe with clean towels. The streak marks will become more apparent when the glass are fogged up in cold rainy weather. One other observation besides streak marks is that glass tends to fogged up easily after cleaning with these cleaners. I could not really confirm but it does feel that way.


Polish the Glass


Usually places like front and rear windshields tend to have more stubborn water spots due to their angles. If glass cleaners do not remove the water spots, then it is time to bring out the big guns -  compounds and polishes.

As usual, before any compounding it is wise to clay the surface. I follow the same routine for glass as well. I just do not want any contaminants to "clog up" my polishing pads. As I mentioned earlier, glass is much harder than paint. So we could use a more abrasive cutting pads.

One could use elbow grease or electric power. I chose electric power. I used my DA. Read about my hands-on with it here.


I so happened to have an Autoglym Car Glass Polish lying around.


Let see what the manufacturer has to say:

"Car Glass Polish is specially formulated to increase visibility through your windscreen for safer driving.

The easy to use, deep cleaning solution removes traffic film, grease, wax, nicotine, insects and water deposits.

Suitable for use on interior and exterior glass. If your windows are perspex, acrylic or plastic use Fast Glass instead."

As mentioned above, since glass is much harder than paint, I would normally use a microfiber polishing pad rather than my usual go to CCS pads.


Microfiber pads have thinner foam that would translate to more "polishing" power.

As usual, the pad needs to be primed (see here for more info on priming). Then spread the product using a low speed, say speed 2.


Once spread, turn up the speed all the way to 6 and start polishing in overlapping pattern in a small section, maybe 1/4 of the windscreen.


Half-way done.

Unlike Meguiar's Ultimate Polish, Autoglym Car Glass Polish does not turn clear after several passes. So, after a few passes, stop and wipe off to inspect.

NOTE: In is important not to let the product dry up else, it would be very hard to buff off.


Autoglym Car Glass Polish tends to be very dusty when buffed off. I guess it would be the case as with other glass polishes.

As for correction power, Autoglym Car Glass Polish is somewhat mild. Very stubborn mark like wiper "curve trail" would not go away. Normal water spots are no problem for it.

Actually, I do not think we need a special dedicated glass polish to do the job. Any regular car polish or compound could do the job. I guess the latter would be better as it is more aggressive and could get the job done faster.

I would highly suggest following the steps recommended by Larry from AMMO NYC here.

Once polishing is done, follow-up with an IPA (isopropyl alcohol) wipe. I diluted my 99.7% IPA in a 1 to 1 ratio with water. One could seal up the glass with any coating after that. However, I prefer not to put anything on my front windshield in fear that it would affect my wipers performance and fear of smearing. It is just personal preference.

As usual, the above are just my opinions. Choose a method that might work for you and happy detailing.