Saturday, June 25, 2016

Cleaning Engine Bay Waterlessly

In most cars, engine bays tend to get neglected when it comes to cleaning and washing. There is this fear that water and detergent used to wash the engine bay will cause problems. I still remember back in the old days where road side car wash centers would wrap "important" parts with plastic bags before hosing down the engine bay. With cars getting smarter and with more electronics fitted in the engine bay, determining the "important" parts becomes a guess work and most people might not want to take the risk. This led to engine bay being opt out when it comes to washing.

However; with waterless wash; we can safely wash our engine bay. It is easy, quick, and safe. Start by getting your favorite waterless car wash product and one or two dedicated microfiber towels for engine bay. If you have access to compressed air or a vacuum blower or a leaf blower then it will be even better. You could use those to blow away thicker dusts and trapped twigs or leaves. If you do not have those then manually pick up trapped twigs and leaves before washing.

meguiar's wash & wax anywhere

First, damped the microfiber towel and wring dry. Spray some waterless wash onto the towel to prime it. Then spray on the engine bay.


Wipe off with the microfiber towel.

Wipe with microfiber towel

The microfiber towel will get dirty very fast. Be sure to rinse it when it gets too dirty. This method could be use to wash anything inside the engine bay safely. Just avoid timing belts and pulleys as they might squeak after washing.

For delicate parts like electrical connectors, spray the waterless wash on the microfiber towel instead and use the microfiber towel to wipe. If in doubt, always spray it on the towel and wipe. That is the safest way.

For auxiliary battery, I would recommend wiping with kitchen towels (disposable paper kitchen towel). There might be some acid stains, salt build-up, terminal grease on it and we do not want to spread this stuffs all around.

Do not forget the clean the underside of the car hood. It can get pretty nasty too.

Car hood

Just avoid parts with grease used for lubrication.

If your engine comes with an engine cover, you could open it up and clean the engine block for a more thorough cleaning.

Remove engine cover

For areas with engine oil spill; especially near the cap; use kitchen towels.

Follow up with spray wax if desired.

That is it. Simple. Safe.


Saturday, June 18, 2016

Quick Review: Optimun Opti-Clean Waterless Car Wash

I managed to get my hands on Optimum Opti-Clean recently. This product is another waterless car wash that I was eager to try. You can read my post on waterless car wash here.

I bought a gallon of Opti-Clean for RM150 from a local authorized distributor, Detailien. It was on sale. Normal price is RM185.

Optimum Opti-Clean Concentrate

This gallon-form Opti-Clean comes concentrated and is to be diluted 1:3. One part Opti-Clean and three parts water. I have a 32oz spray bottle. So, I added 8oz Opti-Clean and another 24oz with RO water.

There was a massive downpour yesterday and my daily drive that I had just given a full wash recently became a perfect test candidate.

After spraying Opti-Clean on the dirtiest panel, I could clearly see the dirt suspended and encapsulated. Great!


Compared to other waterless wash products like Ultima and Meguiar's, Opti-Clean seems to "run off" car surfaces more. It appeared to wet the car surfaces more too. Be prepared for some dripping onto your car porch or driveway.

The wiping part was simple and the dirt got collected onto the microfiber towel leaving behind a clean and slick to touch surface. The slickness is comparable to both Ultima and Meguiar's if not better.


As stated on the label, Opti-Clean can also be used on internal surfaces. I have yet to try that and will post an update on that in the near future. If it works well, I can replace my Meguiar's Quik Interior Detailer with it.

One thing that kind of puts this product aback is the smell. Unlike Ultima and Meguiar's that come with pleasant fragrances (citrus and bubblegum respectively), Opti-Clean smells like chemical. It is not deal breaker but it could be better.

As of now I will list Ultima Waterless Wash+  Concentrate as my first choice and Opti-Clean as my second. The dilution ratio of Ultima gives it there best value for money.

That's it for this quick review.

Thursday, June 16, 2016

Spray Wax

I have mentioned spray wax a couple of times in my previous posts. Now, let us take a look at it.

Spray wax as the name implies is something that we spray onto car surfaces. Unlike traditional paste wax or liquid wax (or sealant), spray wax is very watery. It has properties that provide protection to car surfaces and to enhance shine and gloss. It is very easy to apply. Just spray on and wipe. That is why I would recommend to spray wax after every wash.

Although it is easy easy to apply, it does not last very long. A few days maybe. A week at max. Although some manufacturers claimed that their spray waxes can last for months (Optimum and CarPro), I do not think it is the case here in our Malaysian climate. So, that is why I recommend spray waxing after every wash. And it is easy. I can wax an entire car in less than 15 minutes.

Start by spraying some spray wax on a clean damped microfiber towel to sort of prime it. Then spray onto car surfaces in small panels (say 2' x 2') and use the "primed" microfiber to wipe. Flip to a clean side of the microfiber towel or use another clean dry microfiber towel to buff off. Shake well before each spray.

Since this is not traditional wax, do not let spray wax dry on car surfaces. If it does, add more sprays and wipe off.


My Spray Waxes


These are the spray waxes that I currently have in hand. There is another brand that I used before and I quite like it but I ran out of it and threw the bottle away for recycling. So I do not have a picture of it. So, an honorable mention to Simoniz Instant Wax/ Simoniz Instant Shine (I am not sure if both are from the same Simoniz company as their packagings look vastly different and they smell different too).

Spray wax

From left to right: Meguiar's Synthetic X-press Spray Wax, Meguiar's Ultimate Quik Wax, Meguiar's Gold Class Quik Wax, 3M Auto Essentials Wax, Turtle Wax Express Shine, CarPro Reload.

Meguiar's Synthetic X-press Spray Wax & Meguiar's Ultimate Quik Wax


These two are almost the same thing. One is in a gallon-form for so-called professional use a the other is for normal consumer use. However, they have a different scent. After much calculations, I decided to go for a gallon for more savings as I will be using spray wax regularly. It is around RM70 for 15.2oz and RM330 for a gallon or 128oz (from Amazon or Lazada). This spray wax is easy to apply. Just mist wipe and buff. It creates a slick to touch surface that I like very much and the shine is good.


Meguiar's Ultimate Quik Wax

Meguiar's Synthetic X-press Spray Wax

Meguiar's Gold Class Quik Wax


This; to me; is almost the same as their Ultimate Quik Wax but it is listed to come with Carnuba for that extra deep gloss for darker cars. One of the main reasons for me trying this is that it is slightly less expensive than Ultimate Quik Wax. I also noticed that it is less likely to streak on dark coloured cars. With Ultimate Quik Wax, I will need to buff a little bit more to prevent streaking (greasy/ oily marks on car surfaces) but with this it is easier. Same thing, mist on wipe buff. A little goes a long way. This Gold Class Quik Wax costs RM60 per 16oz.

Meguiar's Gold Class Quik Wax

3M Auto Essentials Wax


I personally do not recommend this product. It seems more like a "fragrance water" to me. It does not feel slick after applying and it does not give a me a feeling that there is a layer of protection on my car. The car surfaces feels exactly the same before spray waxing. This is actually my second bottle. I bought the first one and thought it was a bad batch but the second bottle confirmed my observations. It is a total disappointment! Don't waste your money on this stuff.

3M Auto Essentials Wax


Turtle Wax Express Shine


This is the most affordable product among all my other spray waxes. I can get it for less than RM35 in Tesco (16oz per bottle). It performs well too. Slick and shinny. However, the endurance is slightly less than Mequiar's spray waxes but it is still great value for money. If I can buy this in bulk, I will definitely go for it. I still buy this regularly as I can use it on my wheel arcs, alloy rims, and engine bay. More on that later. Although not listed, I have tried using this as a drying agent when I am in a hurry. After washing, I sprayed this onto the wet surfaces of a car and dried off with a plush microfiber towel. The results were great. I think it is safe to say that this can be used as a "wax as you dry" product.

Turtle Wax Express Shine Carnauba Wax


CarPro Reload


I got this several years back. In fact, this is a left-over bottle. Although it is meant to be used for cars coated with CarPro CQuartz, it is a good spray wax in general but very hard to get here in Malaysia and very pricey. The last time I bought this is for RM100 per 400ml (13.5oz). On the bottle, it is claimed to last for 4 months but again that does not apply in Malaysian climate. This product feels very "oily" and it can streak a bit. It can be diluted 1:1 with clean water for darker cars to reduce streaking.

Car Pro Reload


Spray Waxed!


Here are some pictures of my just spray waxed daily drive. One of the beauties of spray waxes is that they can be used on any surface - paint, plastic, glass. Unlike traditional waxes, they will not stain plastic trims. They actually add more gloss and protect plastic trims. I have seen some detailer using a spray wax even for interior plastics like dash and door panels. It works but I have yet to try it myself.


Other Uses of Spray Wax


Alloy Rims


Since spray waxes can be used to protect literally any surface, I use them for my alloy rims and wheel arcs. 

For alloy rims, just spray the wax and wipe with a old microfiber towel dedicated for rims.


Wheel Arcs


I also use spray waxes for wheel arcs. Usually after cleaning wheel arcs with wheel cleaners, the black plastics on the wheel arcs will dry off to a whitish hue. I think this could be due to the strong cleaning agents from the wheel cleaners.

For wheel arcs, I would normally spray on liberally and leave it to dry. It will dry to a deep rich black.


Engine Bay


I also use spray waxes for engine bay. After cleaning the engine bay waterlessly (will be posting that in the near future), I will use spray wax to protect parts like plastic covers, hoses, painted surfaces and so on inside the engine bay. Why not use a dedicated engine shine or plastic trim shine for plastic parts, one might ask. Well, plastic trim protectant tends to be slightly "sticky" and will attract a lot of dust and dirt.


There are just too many uses of spray waxes. To me, spray wax is truly one of the most amazing inventions is car care world. If you are into cleaning and maintaining your car, grab a bottle and start spraying.

Updated 4th Sep 2016: Check out a new addition to my collection of spray waxes. Autoglym Express Wax. Click here.

Friday, June 10, 2016

Compounding, Polishing, and Waxing

Before we go into the steps that I normally take, let us; very briefly; discuss compounding, polishing, and waxing. Some people may be confused that polishing and waxing are the same thing. Technically, they are not but with the introduction of all-in-one products than combines polish and wax in one product, it is easy to get confused. So let us discuss this in a less technical manner and not go scientific ;-)

Products


Compound


Compounding is used for paint correction. A compound has harsher abrasives in it and when used with a cutting foam pad or microfiber cutting pad, it can cut off thin layers of paint or clear coat. Compounding is used to correct defects like scratches, water marks, oxidation, and heavier defects. Traditionally, a compound will leave a hazy finishing. However, newer products tend to blur the line as some compounds, especially consumer type like Meguiar's Ultimate Compound does not leaves a hazy finish as they want to make it more user friendly. For professional line, Meguiar's do offer the M105 Ultra-Cut compound and if I am not mistaken, it is meant to be used with a rotary buffer rather than a dual action/ random orbital buffer.

My products: Meguiar's Ultimate Compound. Planning to get Optimum Compound.

Polish


Consider polishing to be a step less aggressive than compounding. It can be used to remove minor defects like light swirl marks. It is also a follow up for compounding to remove compounding haze and it leaves a fine finish.

My products: Meguiar's Ultimate Polish, Autoglym Super Resin Polish

Wax and Sealant


Wax does not contain any abrasives and does not have any correction ability. It is used to protect the surface of the car. It acts as a barrier so that dirt and contaminant will not come directly into contact with the car surfaces. Apart from protection, it also add gloss and shine and some slickness that is fun to run your fingers on.

There are two kinds of waxes - natural and synthetic. Most natural waxes contain carnuba which comes from a tree. Carnuba itself is actually very hard and in order to be applied to car surfaces it has to be somehow "synthesized". Usually, only minute amount can be found in car waxes. Synthetic waxes are sometimes called sealant. They are fully synthetic.

So why these two? Some people argued that natural wax gives a more deeper gloss compared to synthetic wax. However, synthetic wax last longer. So for our climate in Malaysia, I would say that a natural wax will last 1-2 months and a synthetic wax 3-4, maybe.

Wax can be layered. In order to achieve the best of both world, some people would put a layer of synthetic wax and top it off with a natural wax. This will give a much deeper gloss, especially in dark-coloured cars, and last longer.

My products: Meguiar's Ultimate Paste Wax (synthetic), Autoglym Extra Gloss Protection (synthetic). I do not have any natural wax as my own daily drive is silver colour and most of my previous cars are light coloured. So I went for a longer lasting product and do not need the deep gloss. Might be a different story for my wifes daily drive now.

All in One


All in one products combined both polish and wax. However, the amount of abrasives are very little and can be used for very minor paint correction, if any. The wax would not last as long also. But this product earns it place in the detailing world because it is a time saving product. Instead of going step by step to polish, buff, wax buff, this product is a single step product.

My products: Meguiar's Cleaner Wax, CarPlan Triple Wax, Simoniz MaxWax, PermaGlass Polymer Sealant. Why so many? Well, I started off with these before going full fledge.

Moving on, we need tools to apply these products. I started off using elbow power. Applying these products by hand. Not only it is time consuming but correction are limited. But it is a good workout.

Then, I start exploring for power tools (of course with a tight budget). So here are some tools available in the market...briefly.


Tools


Rotary buffer


I consider a rotary buffer as the real pro tool. It has the most cutting power and needs many practices and good skills to handle. If not handled carefully, it will burn through the paint. 

Dual Action Polisher/ Random Orbital Buffer


These are safer than rotary buffer and still offer good paint correction capability. Instead of just a rotating spindle, it oscillate in an eccentric circular motion. This dual action motion prevents burning of paint even if it stays on the same spot for long period. This is the to-go-to tool for most detailers and they are the most costly.

When I started to look for tools a few years back, these dual action tools are hard to find in Malaysia. Brands like Porter, Griott Garage, are almost impossible to find back then and will need a transformer as most are rated 110V. Recently Meguiar's introduced their 220V dual action polisher and it cost nearly RM2000. So I ended up with Bosch GEX 125-1 AE. At that time, this is the most affordable tool that I can get. Some discussion of this tool here and here.

Meguiar's Ultimate Compound and Polish

Random Orbital Waxer


Although this tool has random orbit, it lacks power for paint correction an is mostly use for wax application. Example is like this. If you need something that can correct paint, at least go for a proper random orbital buffer.


Pads


There are several different kinds of pads from foam pads to microfiber cutting pads. I myself uses Lake Country CCS pads and ZFE pads. These pads are color coded and have different densities for different purposes.

Lake Country CCS Foam Pad


In the picture above the diamond pads are from ZFE and dimple pads are from Lake Country. The density is similar for:

ZFE orange = Lake Country Pink --> for very mild cutting and polishing
ZFE white = Lake Country Green --> for polishing/ finishing
ZFE black --> for wax sealant application

Applicator pads


These are pads used for hand application. For me, I usually use hand to apply final wax or sealant.


Methods


Now let us jump into how I go about working on a car, or in this case my wife's DD. After washing and cleaning a car in preparation of polishing (I use the word polishing as a representation for compounding, polishing, waxing), I will inspect the overall car condition. If the car is only with minor defects like very minor swirls, I will go straight into polishing. If there are heavier defects like scratches or watermarks, then I will go for compounding. Why do the unnecessary, right? If polishing alone can bring back the condition to acceptable level, then do not go for compounding. How acceptable is acceptable? Well it depends. If the car is a showroom car then acceptable levels will be almost perfect and if it is a daily drive, there is no point going OCD about it. As long as the car looks good to you, it is good enough. For me, if I park my car under a lamp, say a lamp post at night and I do not see "spider webs" like swirls or scratches, I am happy. Remember when you polish your car, you are removing nanometers or micrometers off from the car paint or clear coat. So, do not overwork it. Prevention is better than cure works here also. Try to maintain your car condition by washing it regularly, follow by spray wax every wash and wax every few months.

Alright, let's move on with the steps. 


As can be seen above, there is some scratches on the front hood of the car. Here, I will start with the least aggressive method. I will first use polish to see if the scratches can be removed.
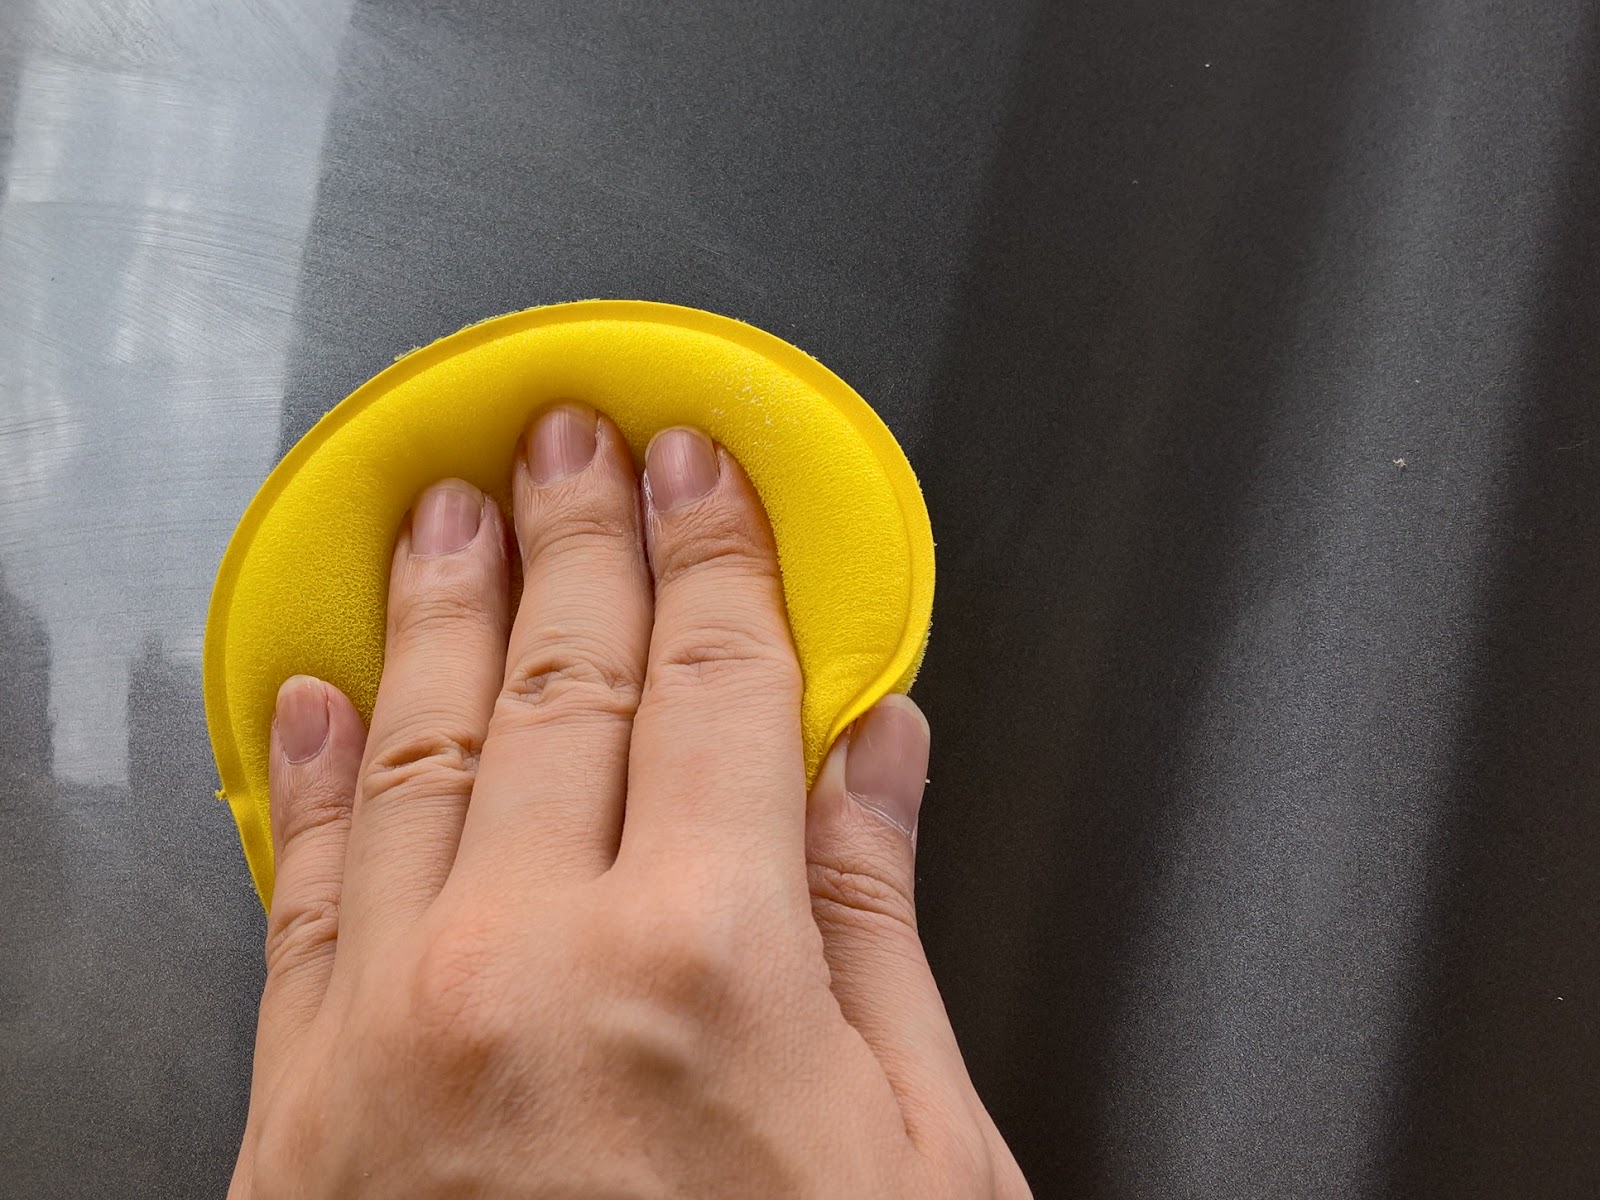
Priming the Pad


The first step is to prime the pad. To do this put some product (Meguiar's Ultimate Polish) on the pad and spread it evenly all over the surface of the pad with your fingers. In older methods, it was generally advised to draw an "X" with the product on the pad to prime it. Squeeze the polish from an applicator bottle to draw an "X". However most recently, there are new arguments that spreading the product evenly on the entire pad surface is better. With the product all over the pad surface, it is more difficult for dirt to get trapped in the pad. We do not want this dirt to get in between the pad and car surface during polishing as it will reduce the effect of the polish and may introduce more defects. So the idea is more on dirt management. Make sense doesn't it? I think so...So I became a dirt management man since then. 

Let's Get to Work


So I started with polishing on a small area around the scratches to see if it will remove it. Always polish in small panels say maybe like 2' x 2' or even smaller. 

First set the tool (DA or ROP) to a low speed and spread the product around the work panel. Once done, set to a higher speed. This will depend on your polishing tool. On my Bosch GEX 125, I usually set to speed 4-5. Start by moving in overlapping straight lines. Then switch direction to overlapping straight lines perpendicular to the initial lines. Switch back to the original straight lines and repeat a few times (a few passes). Sorry, I should have included a video here but there was nobody to help me to shoot a video. GoPro maybe?

In order for the polish to work, it needs to get broken down to small particles to abrade the paint. When first applied onto car surface, Ultimate Polish starts out whitish. After a few passes, it will "diminish" and turn almost clear. If you feel that a few more passes is needed, add more polish, around the size of a 20 cents coin (Malaysian sen) to the center of the pad and continue polishing.

So after polishing for a few passes, I used a clean microfiber towel to wipe off the polish residue.


As can be seen above, the scratches are still visible, albeit less obvious. With that, I decided to move to compounding. I used another clean foam pad and prime it with Meguiar's Ultimate Compound. I used a similar light cutting pad. As I am writing this now, I think that I will get a heavier cutting foam pad in future to save some number of passes and save some time. Anyhow, these are the pads that I have now.


After following the same working method for polishing mentioned above. I was able to remove the scratches. Then I continued to compound the entire hood, wiped off, and followed with polishing. The result was great.


For the rest of the surfaces, I just went straight into polishing. 

After polishing a few panels, the polishing pad would get dirty. I normally set the polishing tool to a low speed and use a brush to brush off the dirt.


CAUTION: Do not compound or polish under direct sun light. Do not let them dry on the car surface. Work them in and wipe off panel by panel. If the compound or polish dried up on the car surface, use some spray wax to remove them.

Waxing


Once the entire car is polished and wiped clean, it is time to protect it. Compounds and polishes are use to correct paint and they do not have properties to protect paint. Unless we are using an all-in-one product, we need to protect the paint. This is where wax and sealant come in.

I used Meguiar's Ultimate Paste Wax for this time. It is a synthetic wax. Once on, with proper maintenance it should last for a few months.

Meguiar's Ultimate Paste Wax

Unlike compounds and polishes, we do not need to work in the wax. Just apply a thin layer of wax, let it dry and wipe off. This is why I prefer hand application rather than machine. I can easily wax the whole car in a 10-15 minutes.

For waxes and sealants, we will need to wait for wax or sealant to dry up and haze up. Waxes and sealants usually go on clear and haze up when dry. Some car care enthusiasts recommend leaving the wax on for a few hours or even over night before buffing it off. But if we do not have the whole day to work in a car a simple method to see if the wax is ready to be buffed off is to do the finger swipe test. Run you finger on the wax. If it comes off easily from the car surface, then it is dry.


Once all buffed off, enjoy the shine.


There you go. Compounding, polishing, and waxing. However these steps could not remove some defects. Those defect could be stone chips or dents. What I dislike the most are dents from other people knocking your car when they open the door of their cars parked next to you.


So, the next time when you open your car door, be considerate. Try not to bang somebody else's cars.

That's it for this post. Sorry for the long post but there are just too many things to share here.
Cheers!

Saturday, June 4, 2016

Full Wash - Prep for Polishing

After much procrastination, I decided to give my wife's DD a full treatment. Wash, polish, and wax. The car is not in a good condition with a lot of minor scratches and acidic bird droppings stains.


Some of the bird droppings have already etch through the clear coat. That would be beyond correction by compounding and polishing. I wonder what the birds eat in my wife's workplace parking lot.

In order to prepare the car for polishing, it needs a full wash. It is not just a simple full wash but a decontaminate wash where I used a stronger car wash shampoo to clean off all the dirt and gunk. The car surface will need to be clayed.

Tools


First up, the tools needed.

2 buckets and 2 grit guard


Grit Guard


Grit guards are placed at the bottom of the bucket. Their function is to prevent wash mitt from coming into contact with the dirt trapped at the bottom of the bucket and also act as a scrub board for the wash mitt.

These grit guards are from Meguiar's and they are not cheap. The can range from RM50-70 a piece. A cheaper alternative would be to use a plastic colander (basket). They are only a few ringgit each. Choose one that would fit inside a bucket and has as few flat faces as possible. Check out the green colander that I used before I got the Meguiar's grit guard.


Wash mitt


Either a microfiber chenille wash mitt or a plush microfiber wash mitt can do the job. Just don't use some old rags or old t-shirt. Microfiber has properties to lift up the dirt from the car surface and prevent the dirt from dragging on the surface.

Wash Mitt

Microfiber drying towels

Either a waffle type (yellow) or a plush microfiber towel will do. Waffle type microfiber towel absorbs more water so less wringing is needed.


Waffle Microfiber Towel

Shampoo


Since I was preparing the car for polishing, I used a stronger car shampoo. In fact any good quality car shampoo will do. Here I used Iron-X snow wash and Iron-X to clean the lower edge of the car.

Car Pro Iron X


Washing

Start washing by hosing the car down. High pressure water gun is optional if the water pressure at your place is sufficient. The idea is to blast away all loose dirt and bird droppings off the car surface.


Hose down the wheels and wheel arcs too.


As I mentioned before, I always start washing from the wheels first.

Spray the wheel and wheel arcs with wheel cleaner liberally.


Use a good wheel brush to brush the rim inside and out.


Use a bigger brush to clean the wheel arc. I got this particular brush from Daiso.


2 bucket wash method

As the name implies, we used 2 buckets. One bucket is filled with car shampoo and another with clean water. First dunk the wash mitt into the shampoo bucket. Clean the car with it. Then dunk it into the water bucket, giving it a good scrub and wring dry. Dunk it back into the shampoo bucket and repeat. It is important to wash the a car from top down, panel by panel. Keep the panel to maybe like a quarter of the roof top size. Once the wash mitt picks up a significant amount of dirt, it is important to remove the dirt to prevent the dirt from scratching the car surface.

2 bucket


After washing, hose down the car to rinse off all the shampoo.

Okay, the next step (claying) is to prepare the car for polishing. If this is just a normal weekend wash, skip claying. Dry the car with a waffle or plush microfiber towel. Grab a spray wax and quickly wax the car. Then you are done.

P/s: I will be covering more on spray wax in future posts.

Claying


Once the car is rinse, skip the drying and clay the car. Clay feels almost the same like plasticine or play-doh. However it has special properties to pick up dirt and contaminants that are still stuck on the car surface after washing. Examples are like over-sprayed paint.


After washing, if we run our hands on the car surface and it feels rough or bumpy, it shows that there are some contaminants stuck on the surface. You can use a sandwich bag as a glove to do this. The plastic will sort of amplify the bumps.

It is important to clay the car before polishing as we do not want these contaminants to be pickup by our polishing pad. Instead of correcting the car surfaces, these contaminants on the polishing pad will scratch the car!

Prior to detailing my own car I had a bad experience. That time, my car had over-spray paint. I am not sure where I got it but it was pretty bad. I sent my car to a road side car wash and the owner of the car wash assured me that he was experienced in removing over-spray and asked me to let him "settle" for me. He ended up adding billions on minor scratches on my car. I had to send my car to the professionals to remove the minor scratches. So, always clay before polish.

To start claying, get a small portion of the clay. You do not need to use the whole piece from the box. Knead the clay and flatten it.

Clay

In order to "wipe" the flatten clay on the car, some lubricant will be needed. We can either use a quick detailer, a waterless wash or a car wash in a bucket.

Here I used Optimum No Rinse Wash in a bucket.

Clay lubricant

Dunk the clay in the bucket. Scoop up some shampoo together with the clay and splash it on the car surface. "Wipe" the clay on all surface of the car. When there is contaminant on the surface, you will get a "rough" feeling when wiping. Continue wiping on the same area until it is smooth. The rough feeling is where the clay catches the contaminants and pulling them out from the surface.

Claying


This is the condition of the clay after wiping half the roof. And remember, this is after washing the car with a strong shampoo.

Dirty clay

Once all the surface has been clayed. Rinse the car again.

Drying

Well drying a car should be simple right? Just use a microfiber towel to wipe and wring.
If not done carefully, drying could introduce scratching. So, I usually use some drying assist. Optimum No Rinse Wash (ONR). ONR has properties to encapsulate dirt. It is also important to rinse the microfiber towel regularly to get rid of dirt stuck onto it while drying.


This wraps up the post. The next post will be about compounding, polishing, and waxing.